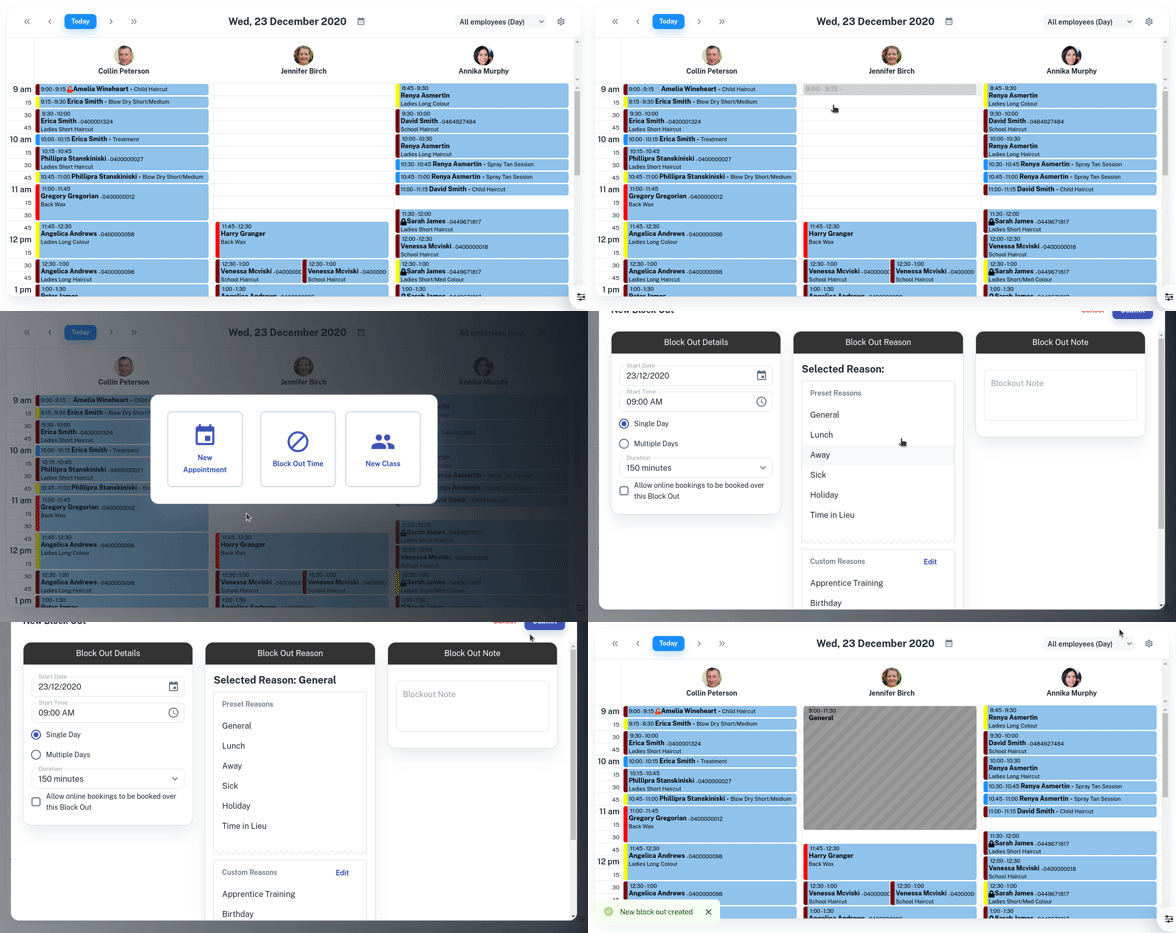
Blockout appointments are very versatile. You can use them to block out a quick meeting, a doctor’s appointment, leaving work early, a holiday and more.
Blocking Out Time in a Day
- Click and drag with your mouse from the start time until the end time of your block out.
- When prompted, choose Block Out Time.
- Optional: Select a Reason
- Optional: Enter a Note
- Press the Submit Button and you now have time blocked out

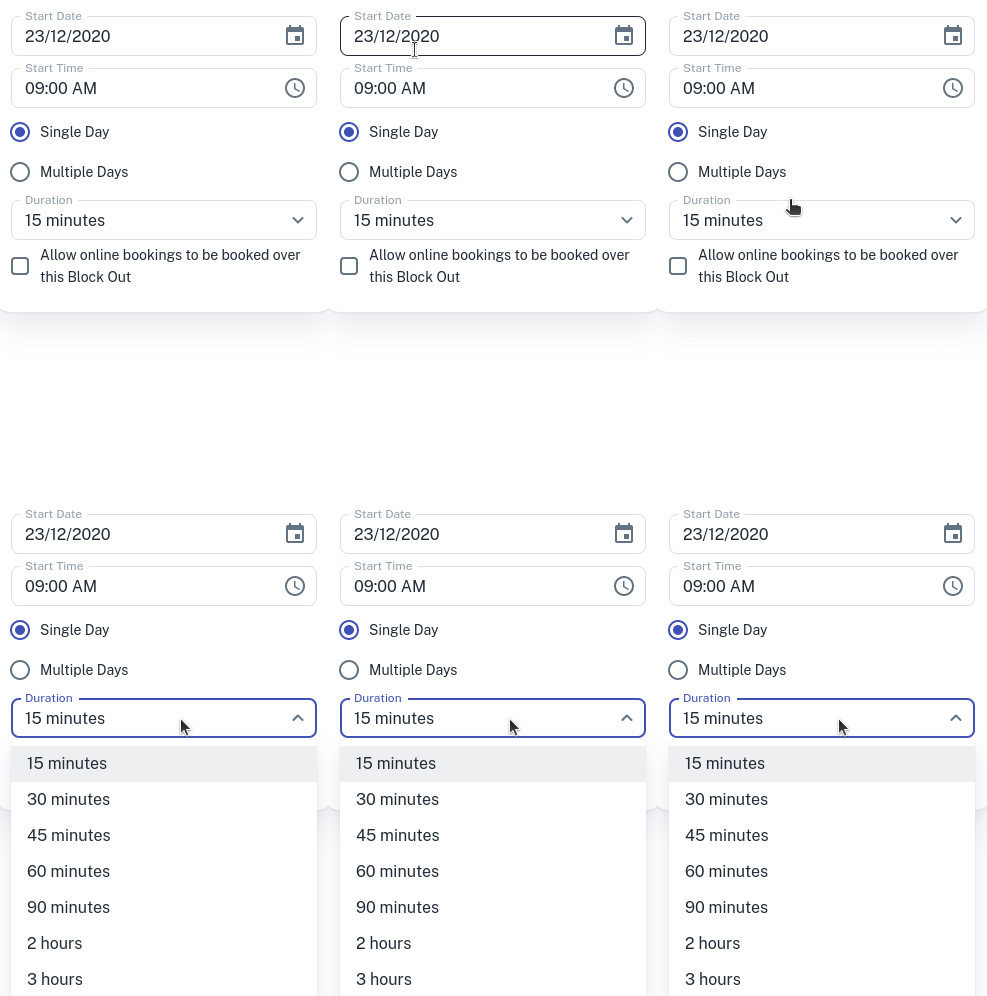
- Optional: When selecting the time you can select from the Duration drop down of a preset about of time.

Blocking Out Holidays / Multiple Days
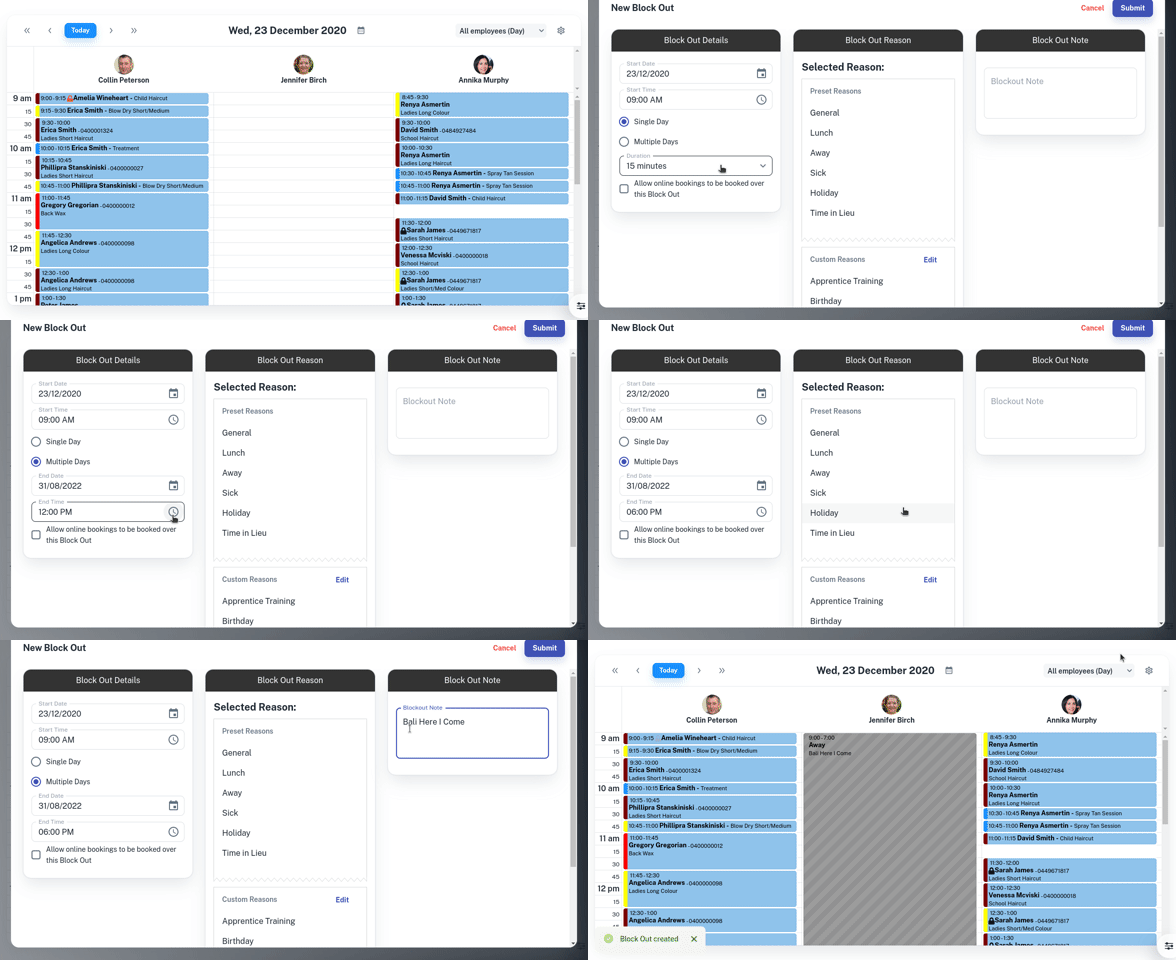
- Assuming booking a holiday, move to the start date of the holiday in the calendar.
- Click on the start time of the holiday in the calendar.
- Select the Block Out Time button
- Press the Multiple Days option on the left
- Enter the End Date to choose the last day of the block out
- Change the End Time to choose what time the last day of the block out finishes
- Under the Block Out Reason select which block reason to select what type of block out it is
- Click on the Submit button to add the block out

Allowing Clients to Book Over a Block Out
When creating a Block Out you may be using it as a reminder or as a temporary space that clients will still be able to be booked.
- Head to the Calendar
- Start to create the Block Out as Instructed Above
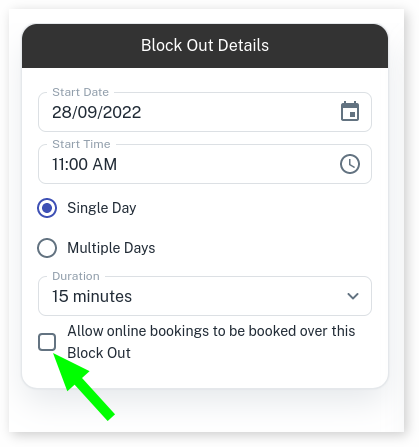
- Tick the Toggle to Allow online bookings to be booked over this Block Out
- Complete Block Out

