The steps below will go through the whole process of taking a sale from the Calendar to finalisation at the Point of Sale screen.
- In the calendar Select the Appointment. This will make the context menu slide out
- Select the Check Out / Take Bill button
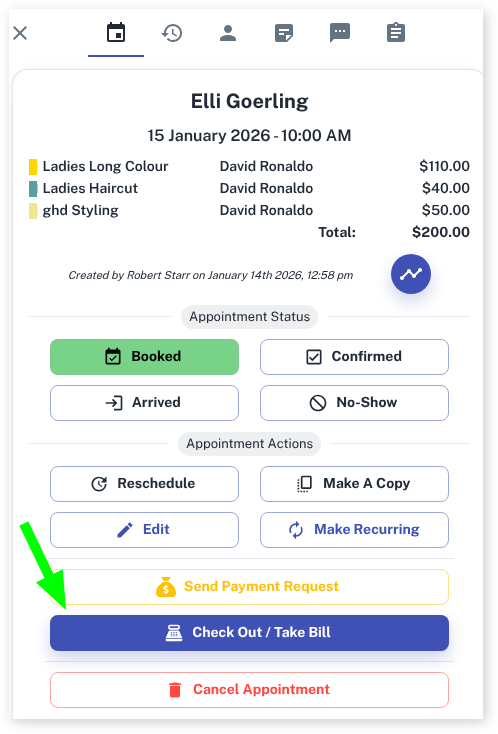
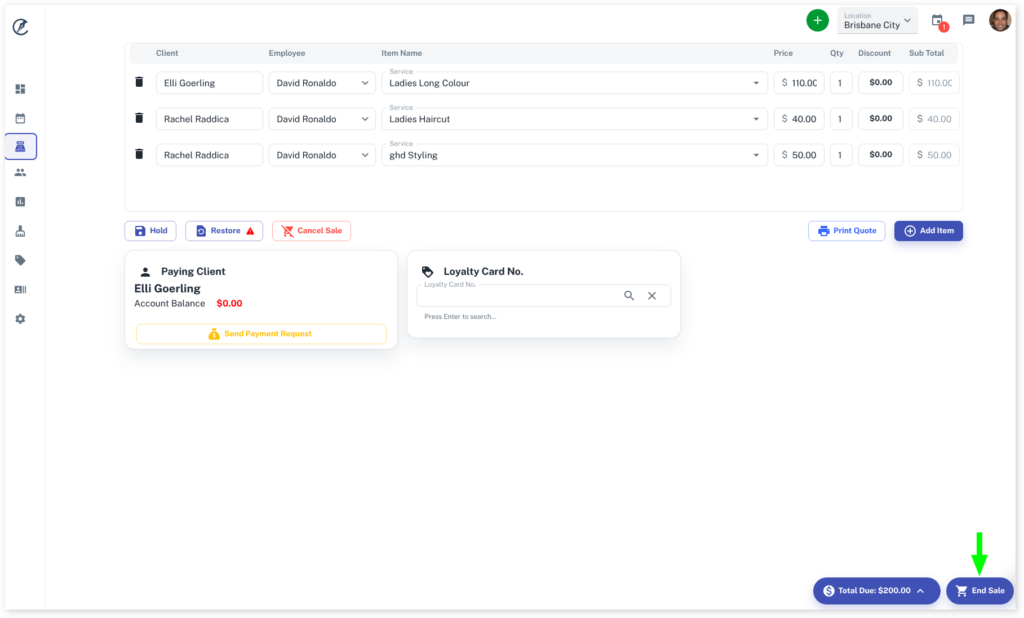
At the POS screen, the transaction will be pre-filled. You can change the price of a Service, give discounts and even change the Services here. We will focus on finalising the bill in this lesson.
- Press the End Sale button at the bottom right
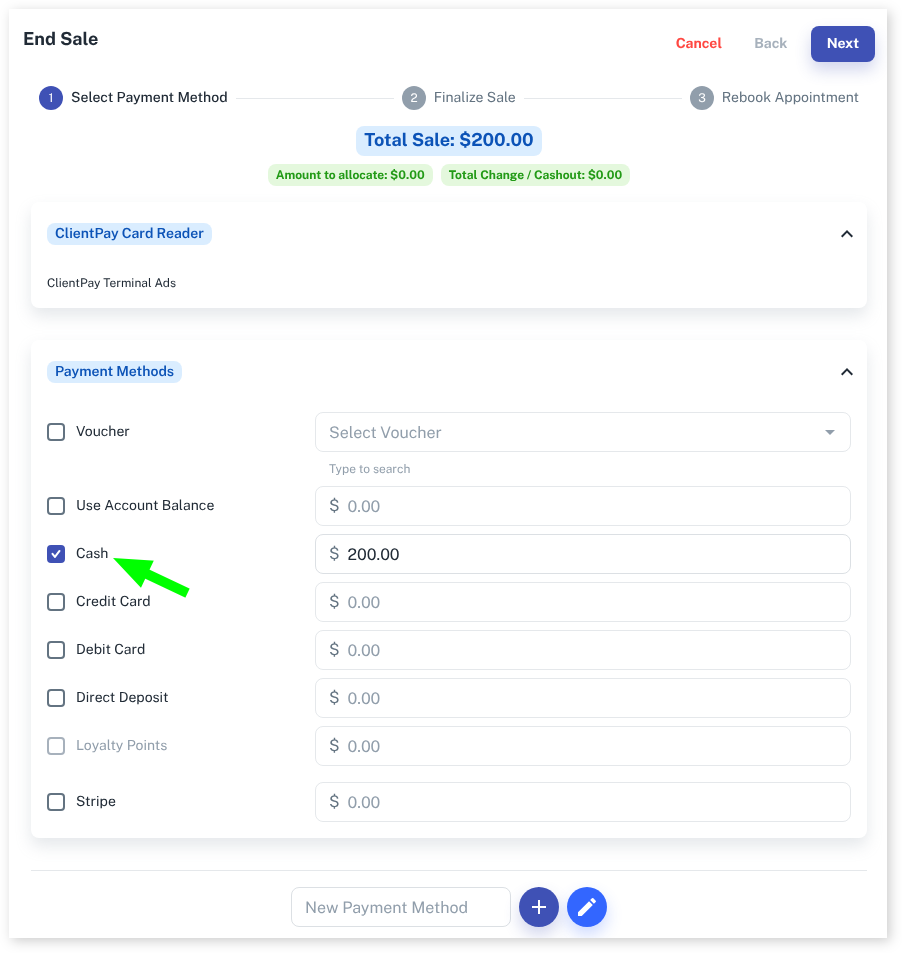
- Now choose the payment type by clicking on the Payment Methods checkbox
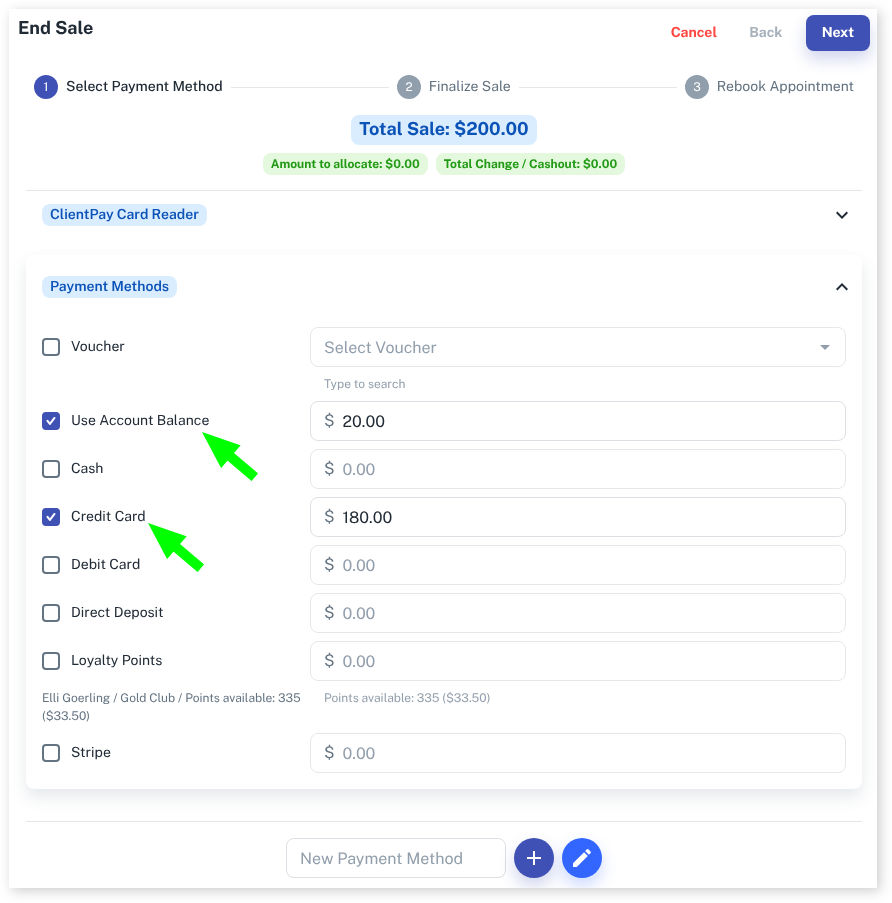
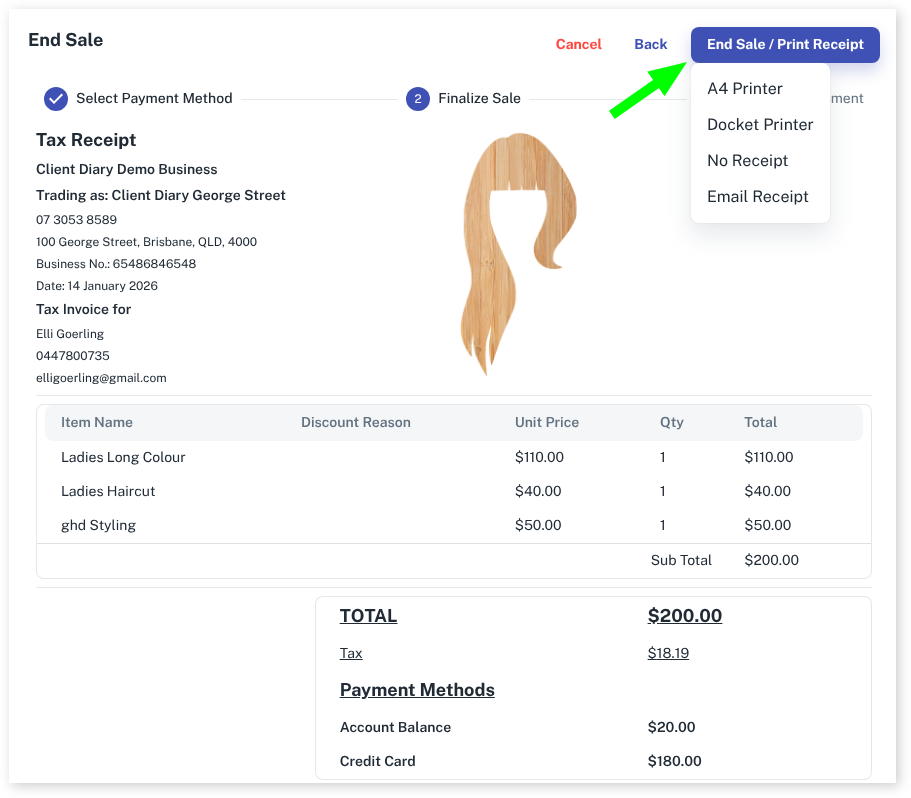
- You can “Split the Bill” by changing the amount in the dollar value and then selecting another payment type. This will have the client pay over multiple types. The example below shows the client paying using the Account Balance and the rest on Credit Card. For more information regarding splitting the bill please click here How to “Split” a Bill.
- Press the Next button in the top right corner of the screen to be taken to the receipt view
- Press the End Sale / Print Receipt button and select your receipt type. It can be printed, emailed or you can choose not to give the client a receipt.
The next screen is a re-booking screen, where you can re-book the client for a future appointment.
- If you don’t wish to re-book the client, select the Finish (No Rebook) button
- At the Rebook Appointment screen you can see the client’s 3 most recent appointments and up to 5 future appointments booked, as well as any waitlisted appointments
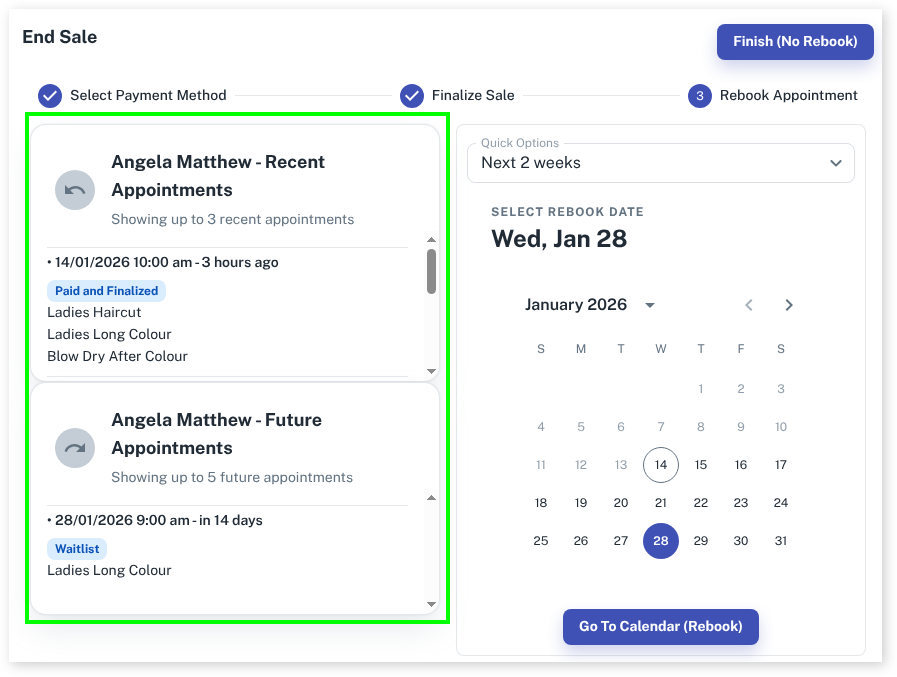
- If you do wish to re-book the client, you can select from the calendar a specific date and click on Go to Calendar
- OR you can use the Quick Options to select how many weeks / months for the next booking
- After you have your future date or future week selected, press the Go to Calendar button

You will be taken to the Calendar where you can simply create an appointment to re-book the client.
- If you decide not to re-book at this point, you can press the X in the corner of the Rebook Mode notification area.

That’s the basics for a completing a POS transaction including a re-booking. Other articles will address more specific information like Gift Vouchers, Discounts, etc.