The default roster in Client Diary is simple to use and works well for employees who’s hours are regular. For an employee who’s hours change from week to week, you’ll want to take a look at the Team Weekly Roster. It allows you to choose specific hours on specific dates as well as rostering days off.
To top it all off, it even has recurring rosters so if you have an employee that for example works every second Tuesday, then Client Diary can do that for you too. This document will step you through how to use the Team Weekly Roster.
NOTE: The Team Weekly Roster overrides the information contained in your employee roster but only where you make changes.
This document contains all the use cases for Team Weekly Rosters. The topics are:
- Concept
- Using the Team Weekly Roster
- Editing a Specific Date
- Editing a Date and Making it Recurring
- Editing a Recurring Roster
- Editing a Roster to Have the Employee Not Working
- Cancelling Changes / Resetting a Roster
Simply scroll down to find the topic that you require and follow those instructions.
Concept
A normal roster in Client Diary just repeats each week. The same days, the same times week after week. It’s recommended you set one up first as close as possible to what your staff will work. Even though it may change, this helps as you don’t need to do as much work later when using the Team Weekly Roster.
First you should setup a normal roster for your employees. There is a document here on how to do that. Once you have a regular roster in place, you can then edit it with the Team Weekly Roster to customise dates that may differ.
Using the Team Weekly Roster
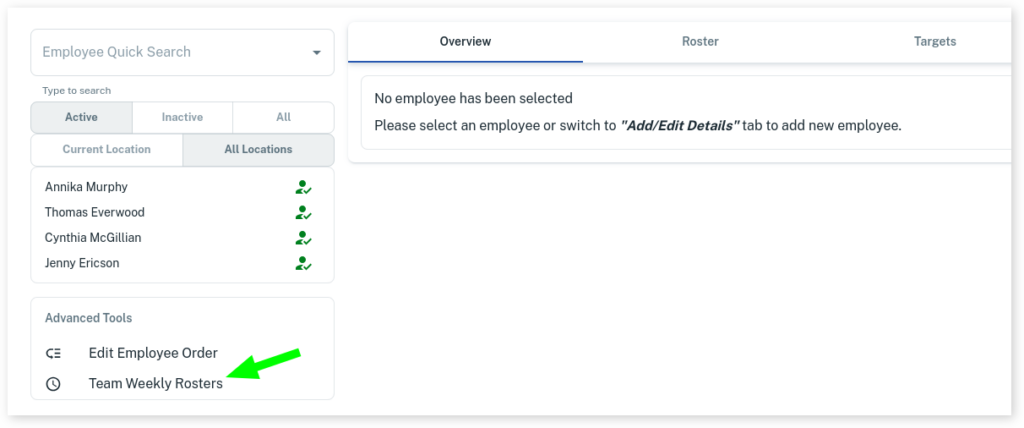
- First of all choose the Employees menu
- Then choose the Team Weekly Rosters button
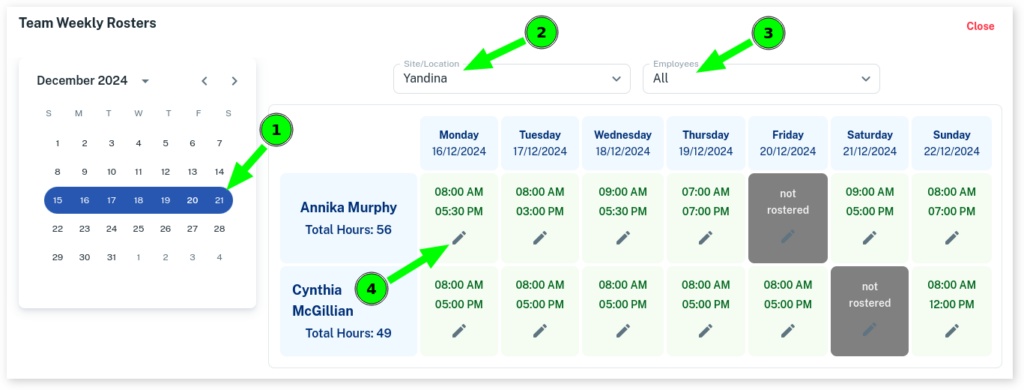
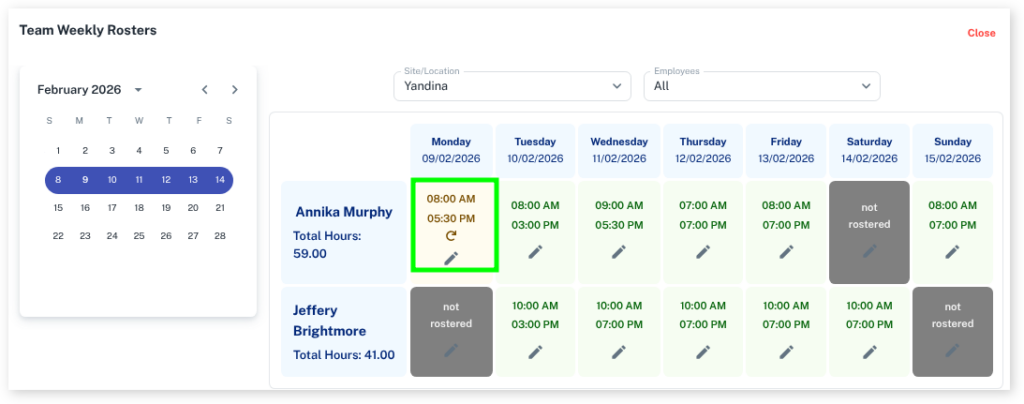
The next screen you see will be the Weekly Roster.
- You can Change Weeks on the left date picker
- You can select a specific location via the top left drop down
- You can select a specific employee via the top right drop down
- You can edit rosters by clicking on the edit icon (pencil) on each date
Editing a Specific Date
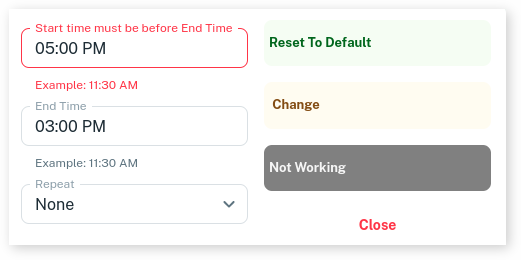
- Select the Edit icon for the date you wish to change
- Set your start time and end time
- Press the Change button

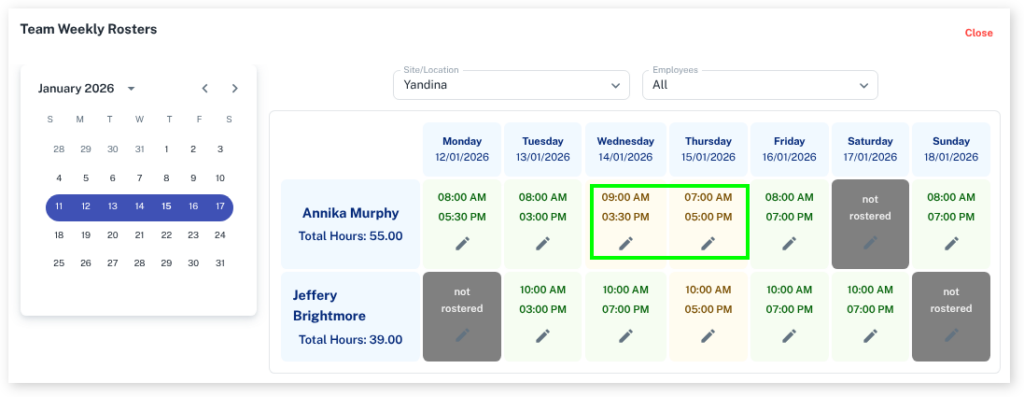
You will see the roster entry changes to an orange colour. This orange colour indicates the date has been modified from the original date.
Editing a Date and Making it Recurring
You can apply the same idea as above but make the roster repeat every X weeks.
In the example below, I am editing Annika’s roster to be working the set hours every 2nd Monday.
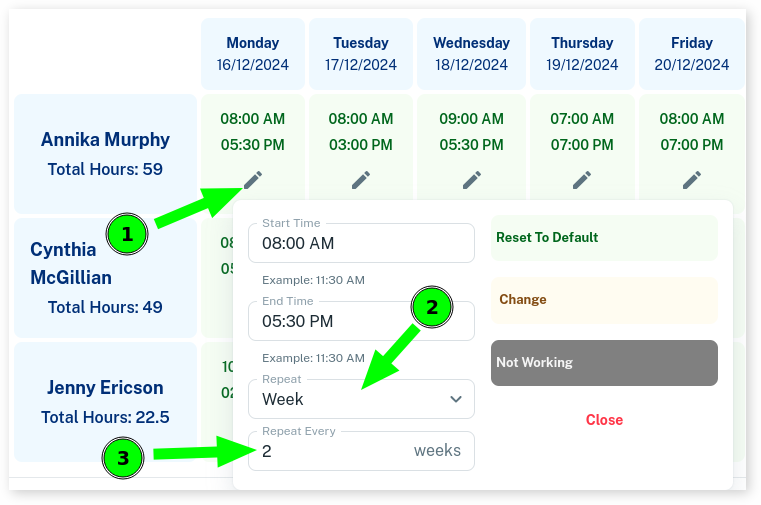
You will see the roster changes to orange with a new small, curved arrow icon on the orange block.
It represents the roster being repeating. When looking through the roster, when you see the small repeating icon you know this is part of a repeating series of rosters.
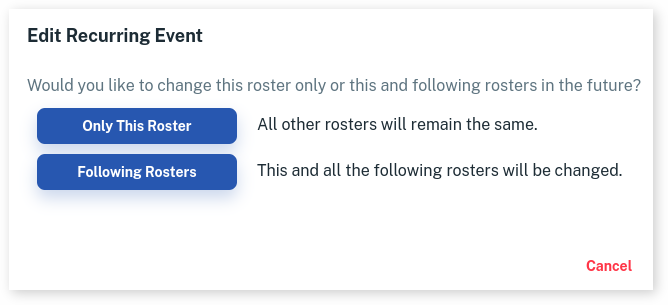
Editing a Recurring Roster
Repeating rosters continue forever into the future. You will at one point in time want to edit that repeating roster. You may even want to remove it.
Once you have edited the recurring event and click on the Change option, you will see the following message.
Select your preference to either only change this roster or all future rosters.
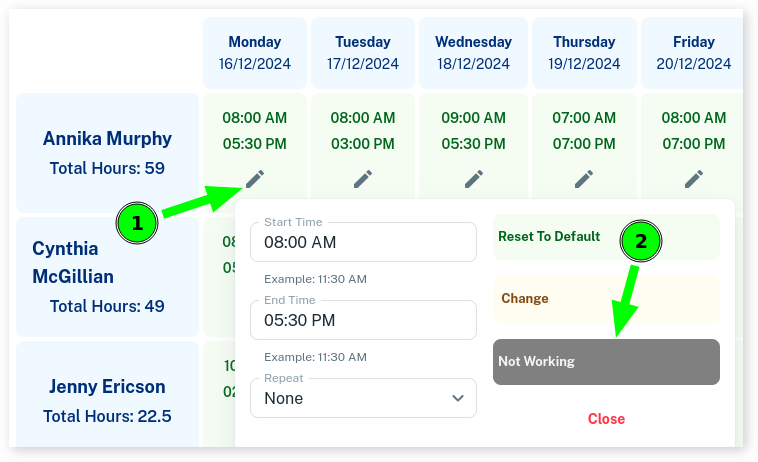
Editing a Roster to Have the Employee Not Working
You may want to block out days where employee’s are not working. This is super simple.
- Simply select the Edit icon
- Press the Not Working button
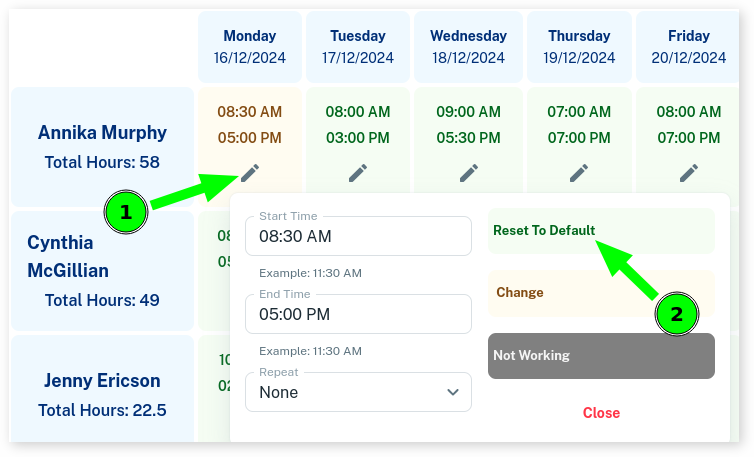
Cancelling Changes / Resetting a Roster
If you ever want to reset a roster back to the original times before you made any changes it’s very simple.
- Select the Edit icon
- Select the Reset button
The roster will return to the normal roster as defined in the employee’s roster tab.
When editing the Team Weekly Roster and the finish time is before the end time, the system will give you a warning to let you know you have entered in an incorrect time