Some businesses have set up stock using products variants, if this is not you, please head to this page instead.
To complete the stock take
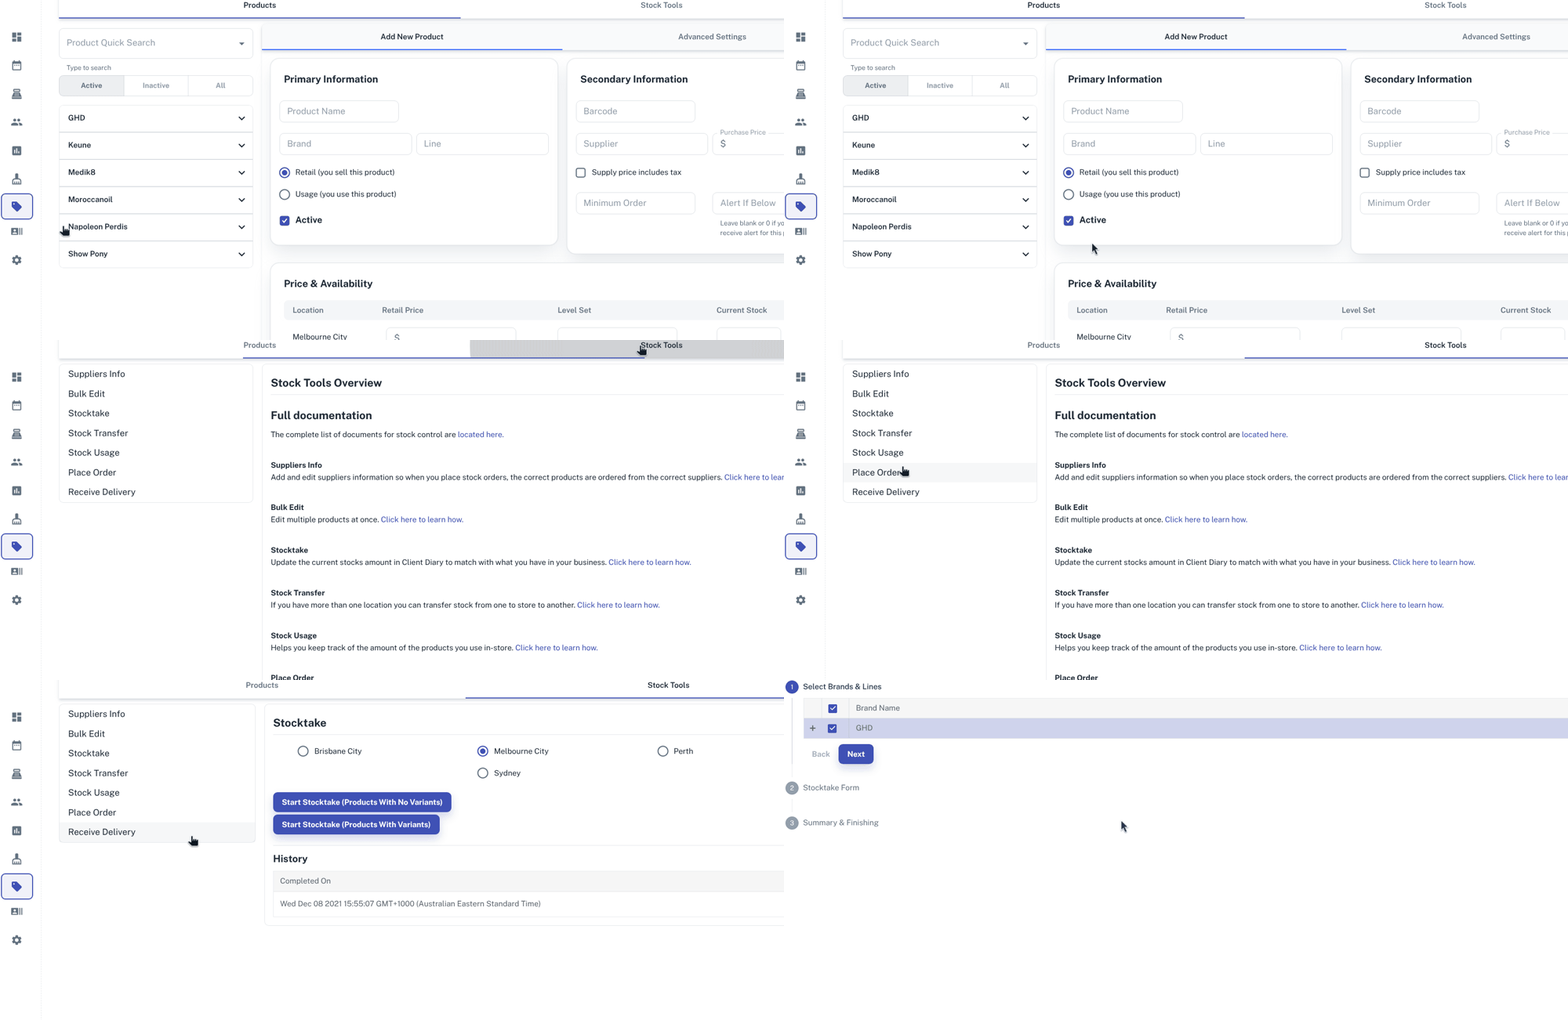
- Select the Products menu
- Click the Stock Tools tab
- Choose the Stocktake option
- Pick which business location you wish to do a stock take on
- Select Start Stock take (Products with Variants) button

- Choose Brands and Lines that will be included in the stock take
- Press Next
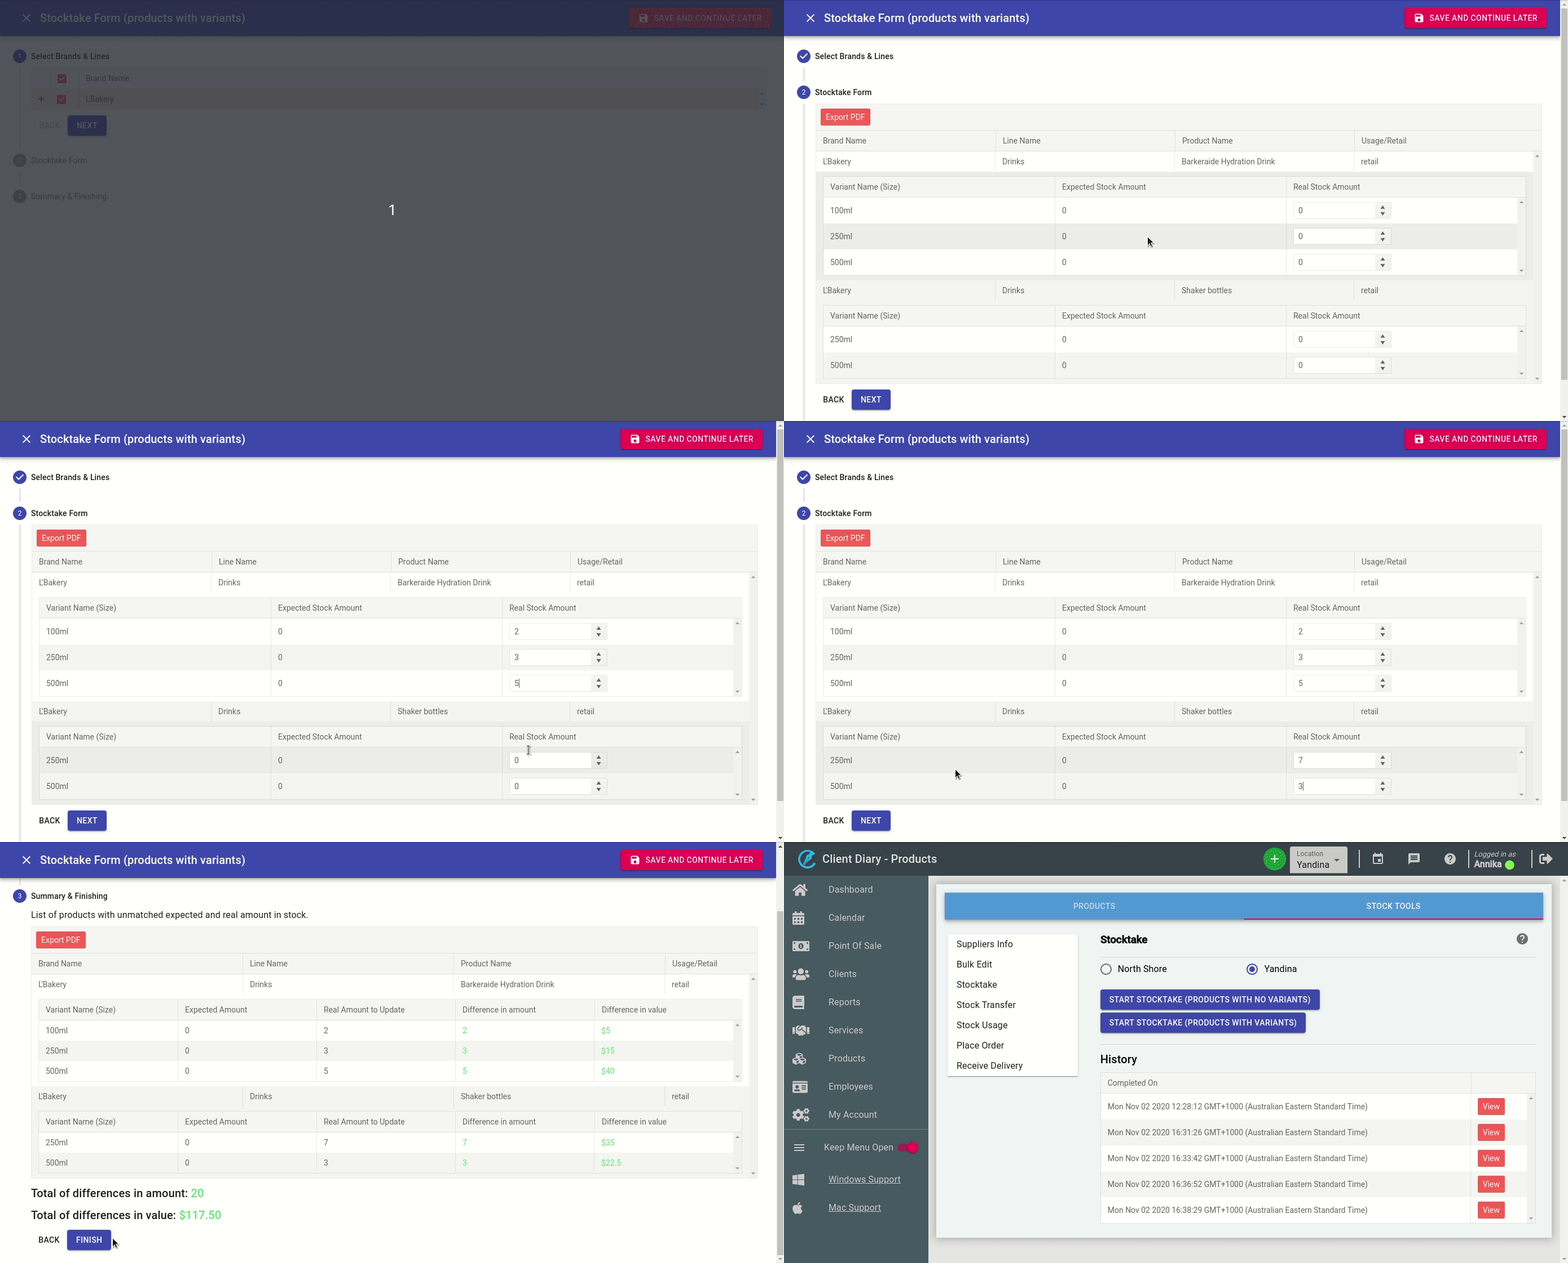
- Enter in Real Stock Amount in appropriate fields the amounts of available stock
- Press Next
- It will then summarise what is entered into the stock take and list at the bottom of the stock take the Total of differences in amount and Total of differences in value
- Select Finish

NOTE: the Expected Stock Amount is what the system thinks you should have on hand based on what you’ve sold recently or what you’ve used in the Stock Usage tool. You do need to have your “level set” value applied to your Products for stock take to work properly. On how to do this just Click Here
How to Print Out the Stock Take Form
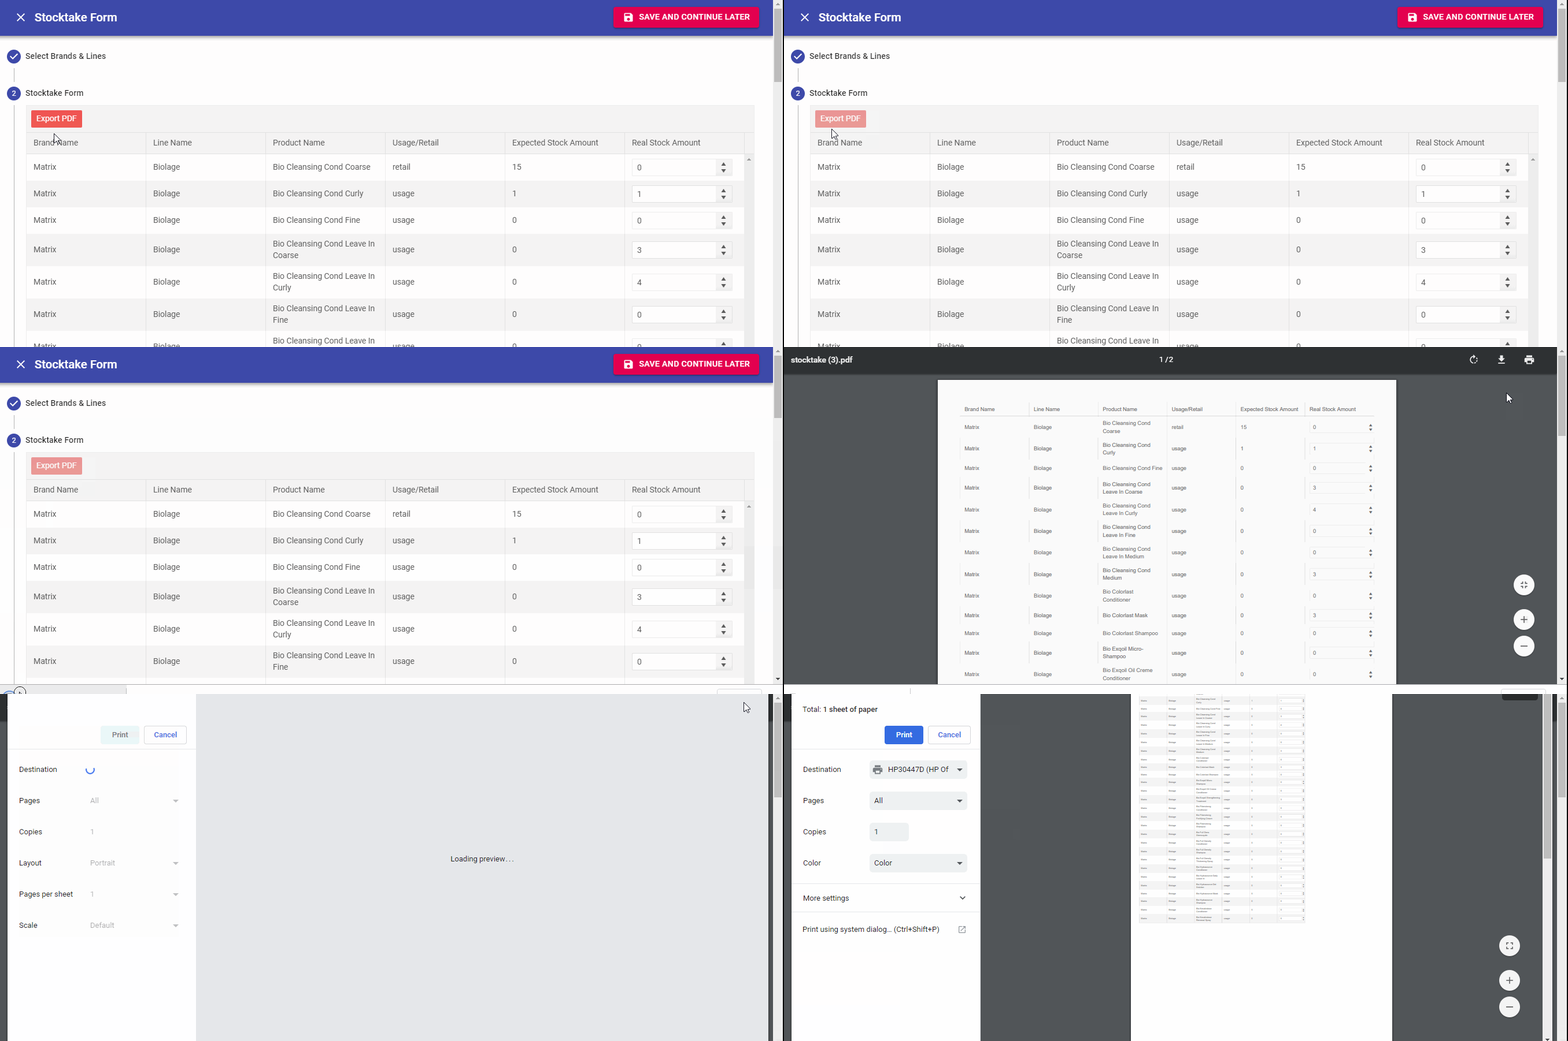
Although designed to enter your stock via an iPad or other tablet, you can still print the stock form to collect amounts via pen/paper if you wish, to be entered on a later date.
- In step 2, Press the Export PDF button

How To View Previous Stock takes
Go to
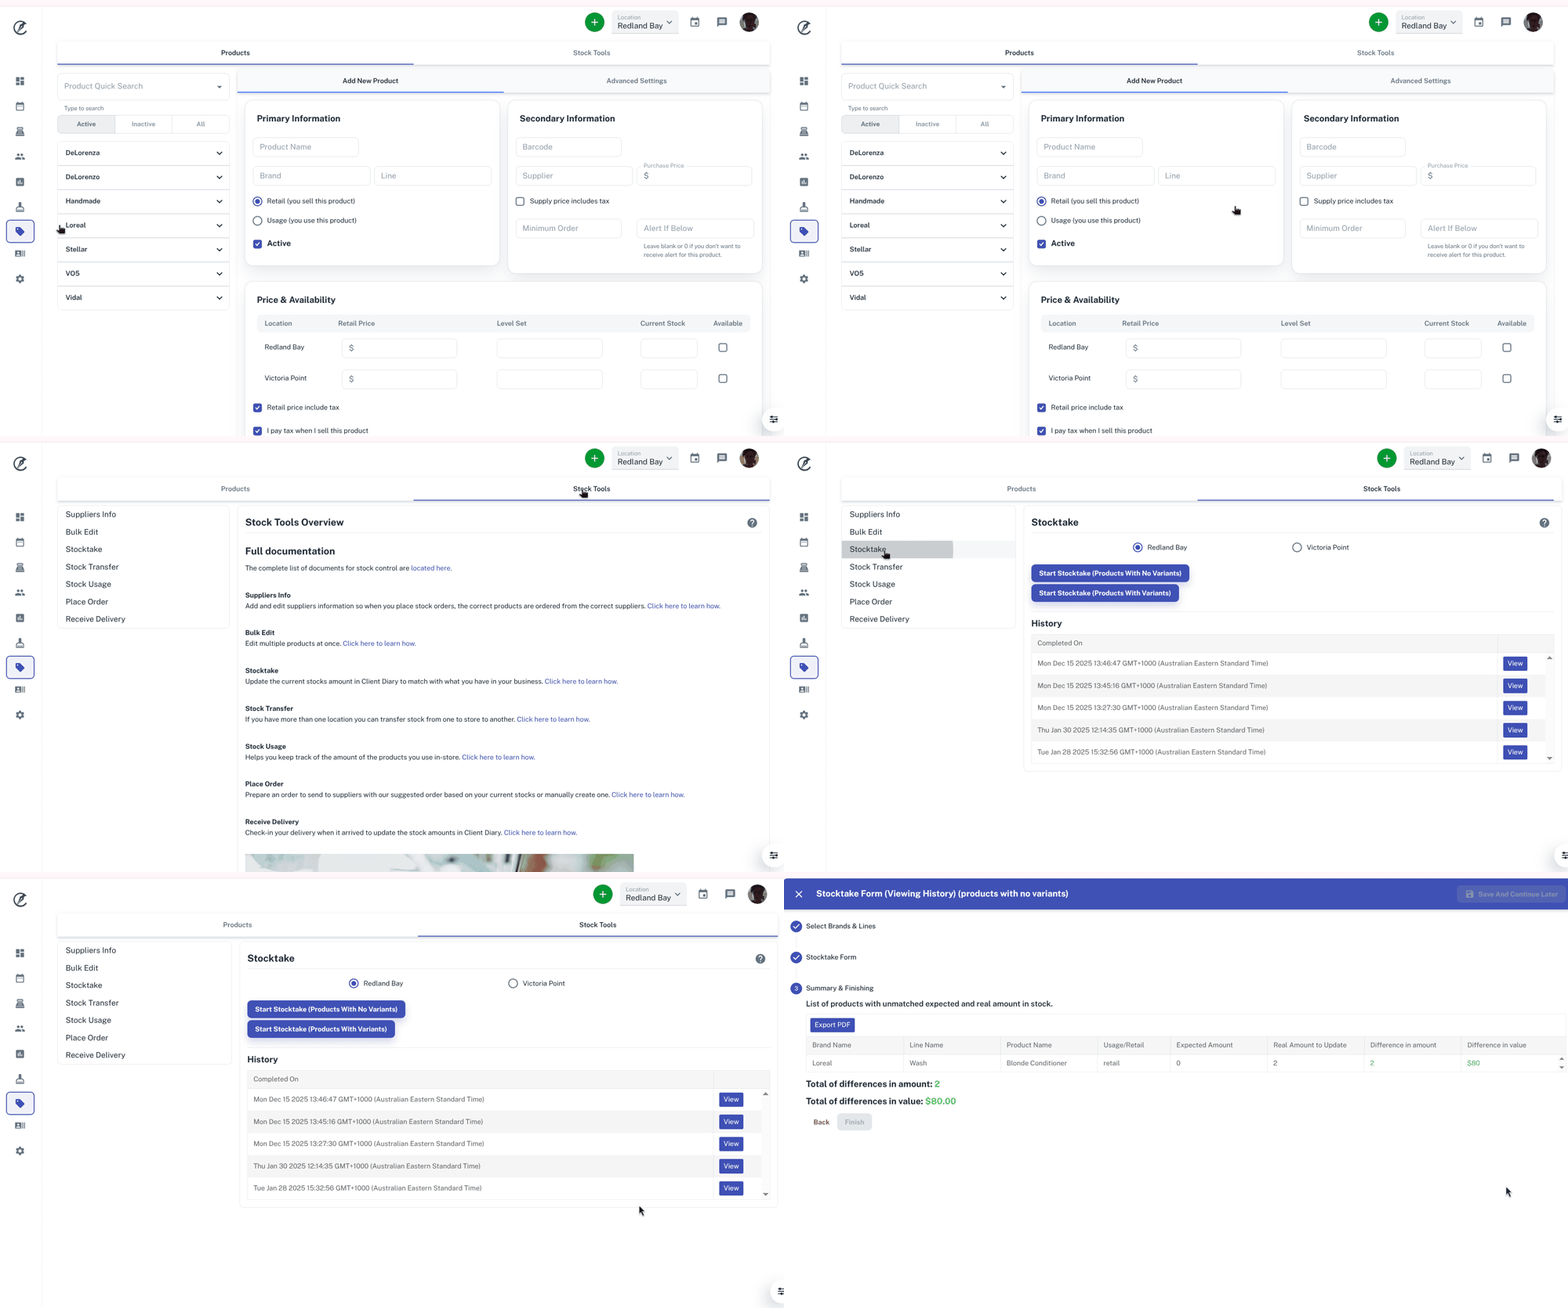
- Choose Products on the left menu
- Click on the Stock Tools tab
- Select Stocktake on the menu
- Under History click on the blue View button to view previous stock take as shown in the screenshot below.

