Once you have turned on the Zapier Connection within Client Diary you can then start to create ‘Zaps’ to integrate your apps together.
Please ensure Zapier is turned on in Client Diary before continuing. If you have not, follow this link.
Linking Google Sheets to Keep Track of Your Clients
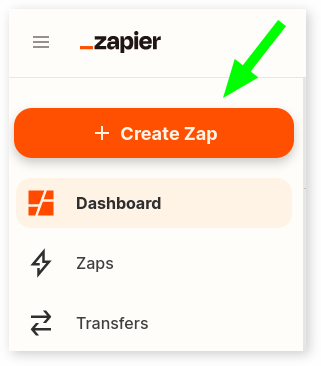
- To start creating a new automation press + Create Zap
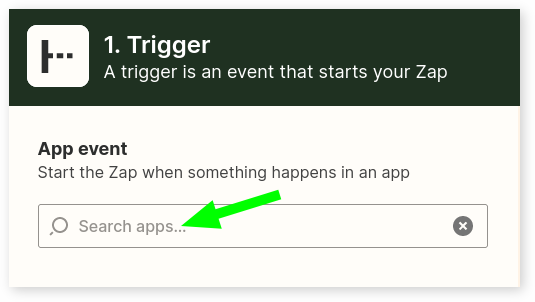
- Now you can search up the first app, with it being Client Diary
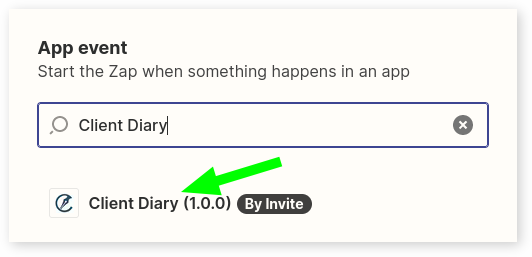
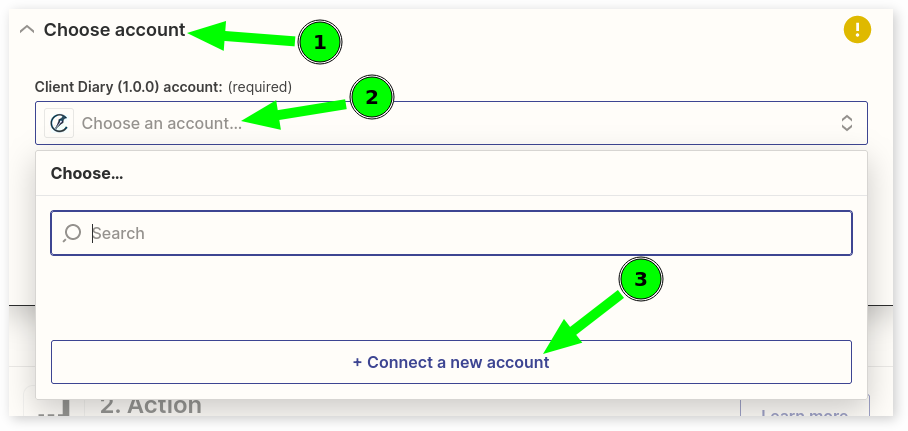
- Select Client Diary
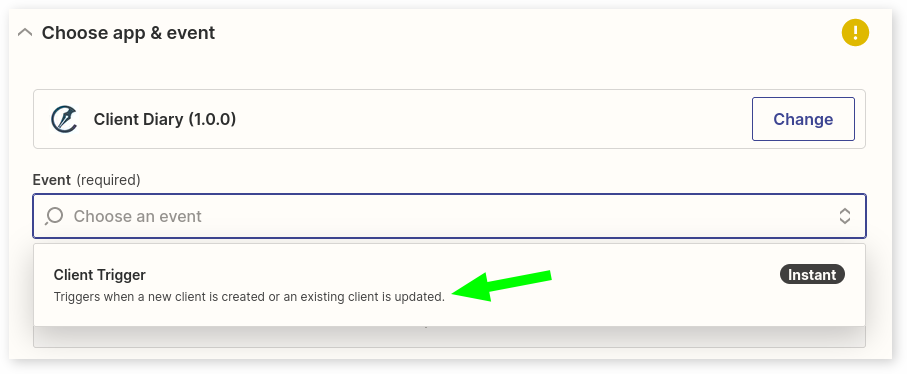
- Choose the Event that will trigger the event
- Press Continue
- Now you can select to add in your Client Diary account
- Enter in the Zapier API Key found in Client Diary
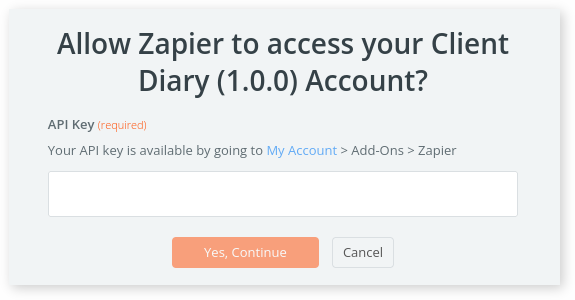
- Optional: This can be copied to your clipboard by pressing the copy button

- Once your Account is loaded, press Continue
- Press to Test the Trigger
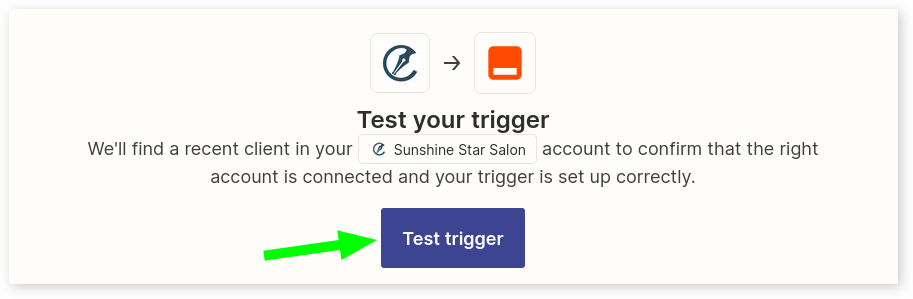
- There will be an example of a client, if correct select Continue
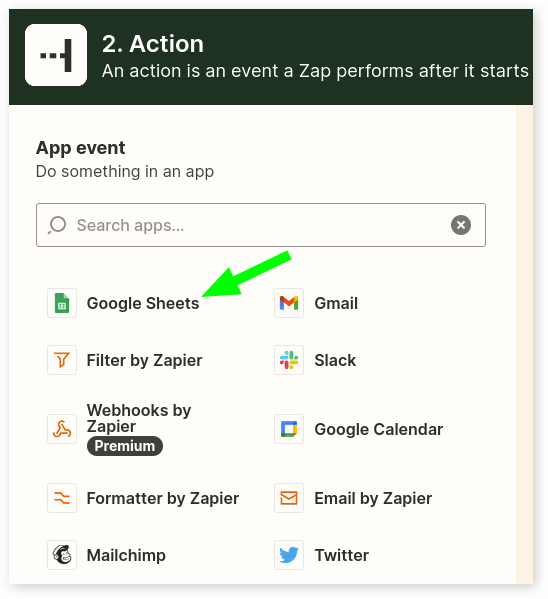
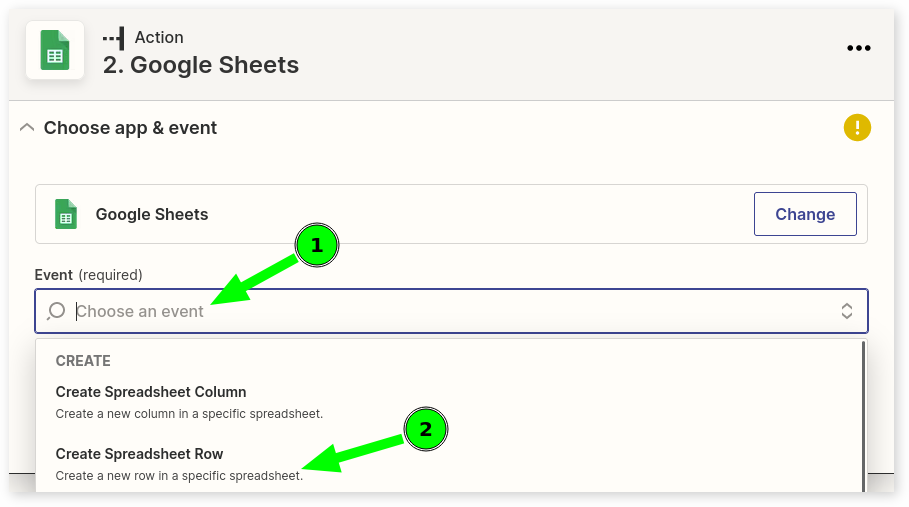
- Now select the Action that will be taken, for this example we will send Client Information to a Google Sheet
- Select the specific event you wish for it take, this example will set up a Spreadsheet Row
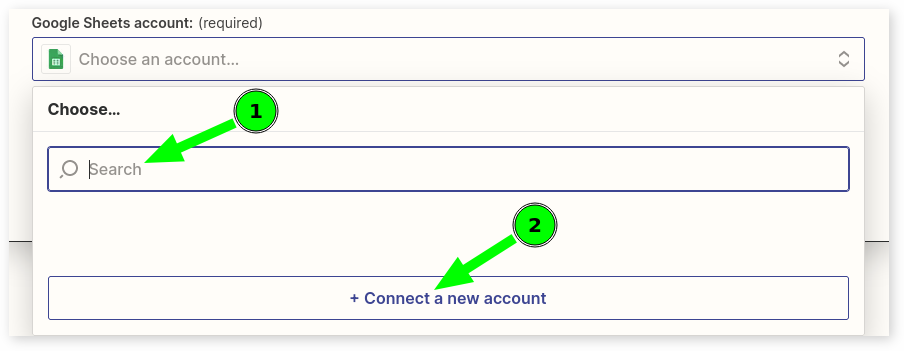
- Press Connect new account to sign into your Google Account
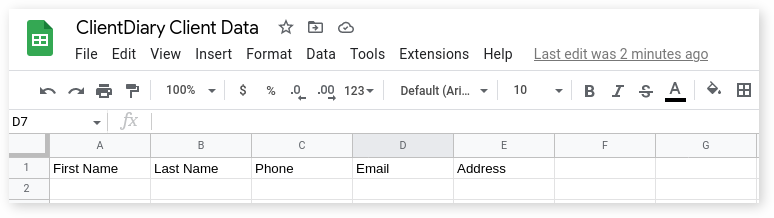
- Optional: Create a new spreadsheet to record the data
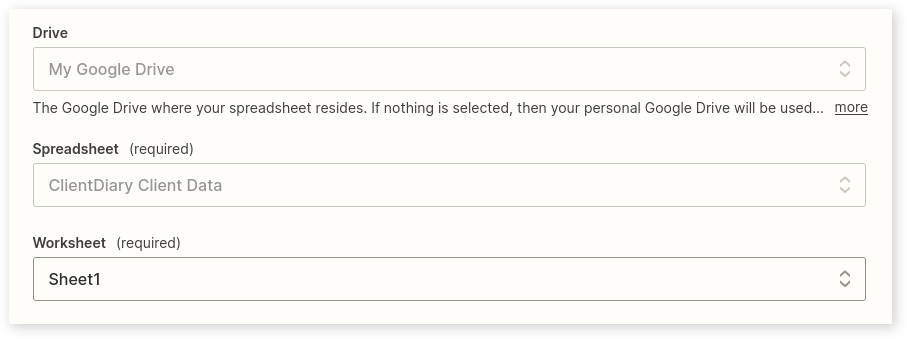
- Select your Google Drive, then choosing the Spreadsheet and which Worksheet it will record the data on
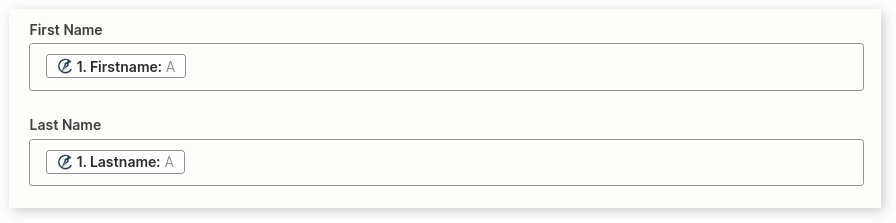
- Enter in which text field will be entered for each data selection
- Optional: Press Show All Options to see all possible data you can save
- Optional: Test and Review to confirm the data saved to the spreadsheet correctly.
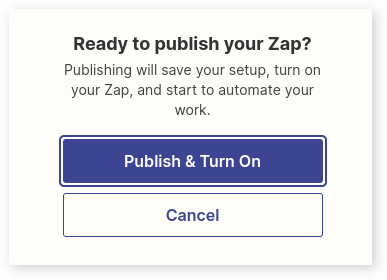
- Press Publish Zap, then Select Publish & Turn On
- This will now automatically send data to the selected spreadsheet when clients are edited or added.