If you haven’t already, we recommend you read the Overview to Online Booking first by clicking this link.
Once you understand the concepts, continue here for step by step setup instructions.
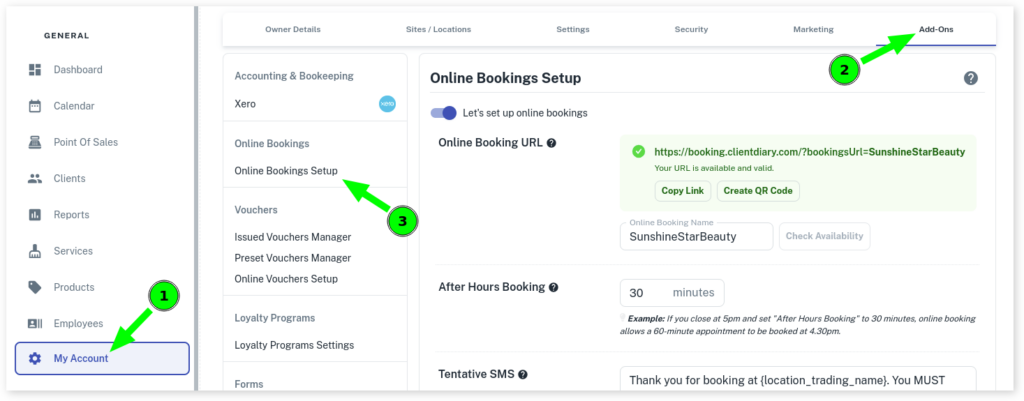
- Head to My Account
- Select Add Ons
- Press on Online Bookings Setup
- Turn on the Lets setup Online Bookings switch & press the Save button at the bottom
Your online booking is now turned on but there are a few more steps.
Setting Which Employees can be Booked via Online Booking
You may only want certain employees to be able to receive bookings online. To restrict / enable employees follow these steps:
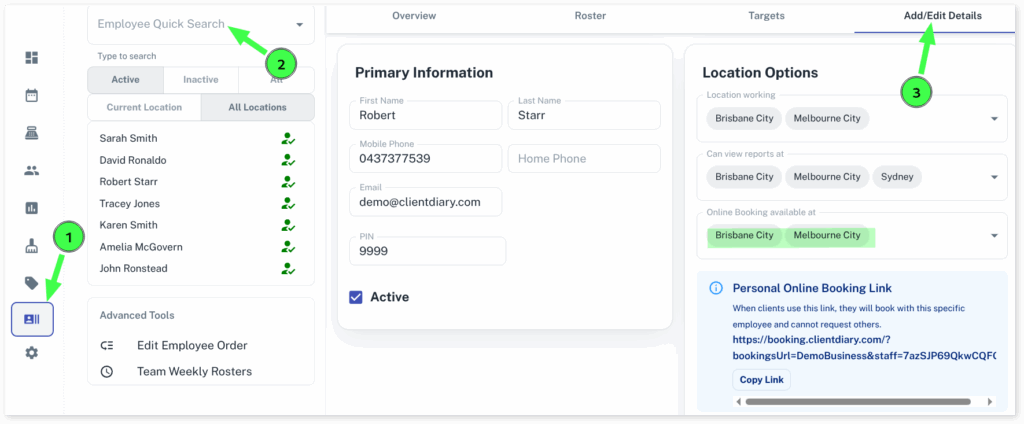
- Select the Employees menu
- Search the Employee you wish to adjust the settings for
- Press the Add / Edit Details tab
- Press the check-box across from Online Booking Available at the site/s you wish them to be available
- Optional: Untick them if you don’t want them to be available
- Scroll down and press Save
- Repeat steps for other Employees
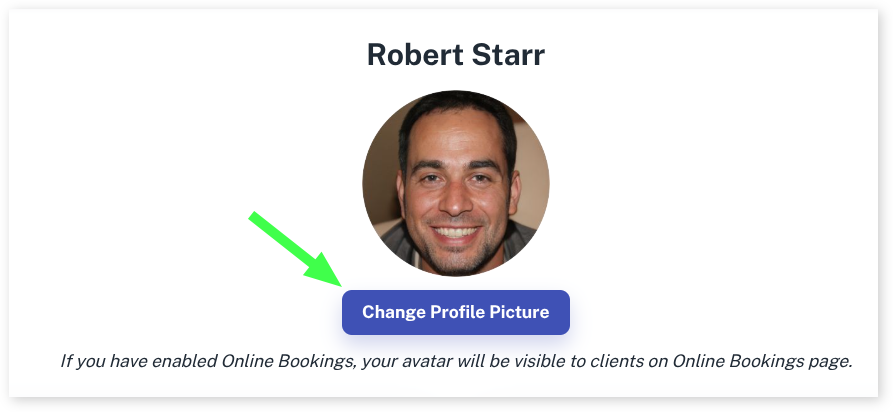
Adding Employee Profile Photos
You can add a photograph of each employee so that a client can recognise them and book. Imagine someone liked getting their hair done with “the gentleman with dark hair and a big smile” but can’t remember his name. The photo will help them to choose the right person.
- Select the Employees menu
- Choose the Employee you wish to add a photo to
- Select the Change Avatar button
- Add the photo using the screen that follows
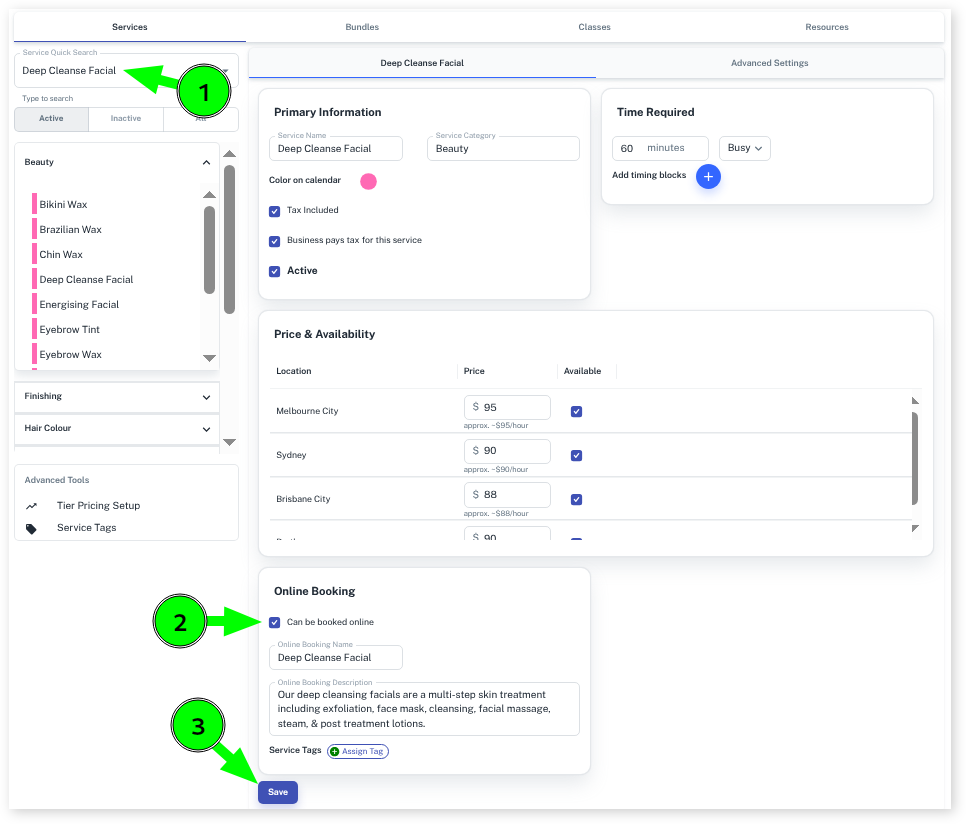
Setting Services Booked Online
You may not want ALL of your Services to be able to be booked online. Client Diary gives you full control over which Services can be booked by your clients and which can’t.
- Select the Services menu
- Search the Service you wish to allow to be booked
- Ensure Can be booked Online is ticked
- Press the Save button
- Repeat Steps 2 to 4 for each Service you want to appear in your online booking
To read more about online booking, including adding to your website or Facebook head to this Overview to Online Booking
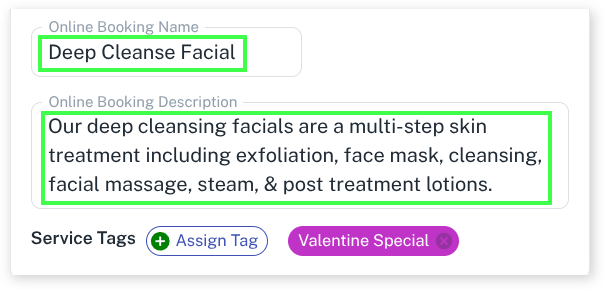
Setting Service Online Booking Name and Online Description for Services
Whilst you can leave the Services as they are, if you want to adjust how the Service is shown to the customer VS how you see it in store, you can use the following.
You can add this info whilst still in the Services’ add/edit screen
- To change the way the Service is named for the customer, simply add a name in the Online Booking Name input
- To add a description to the Service that is shown at the online booking screen, simply add a description in the Online Booking Description input