Client Dairy allows the public to purchase gift vouchers online at any time of the day via either your Facebook or website. This means your business is able to create income even when you’re not there. The voucher tool is incredibly flexible giving you complete control over the whole process.
How a Typical Online Voucher works
- A client visits your website or Facebook page and purchases a voucher
- You, the person who purchased the voucher and the person receiving the voucher all receive an email notification this has happened
- The voucher is created in Client Diary ready to be used
- When the client comes in, they show their voucher on their phone or quote the voucher number emailed to them
- You select this voucher from the list of vouchers in Client Diary as payment.
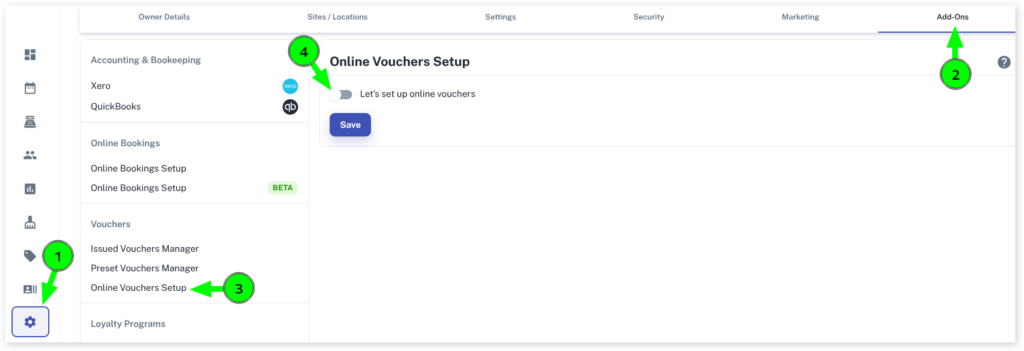
How to Get to the Online Vouchers Setup and Turn On Your Online Vouchers
- Select the My Account menu
- Press the Add-Ons tab
- Choose the Online Vouchers Setup option
- Slide the Let’s set up online vouchers to the on position
If you wish you can choose a new link name. Usually this can be left as it is. You will be using this link when adding the voucher link to Facebook and your website.

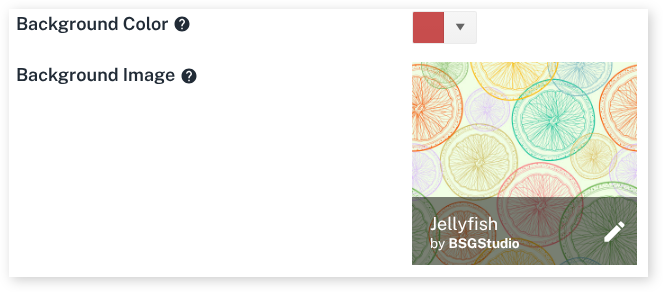
Custom Colours
The Online Voucher Setup allows you to choose a background theme to match your business branding. You may either choose to have a solid Background Colour or you can select a new Background Image if you wish.
Adding Your Artwork
You can also select a fully customisable banner image to give full branding to the online voucher screen. If you have one, select it here and upload it. We recommend having your graphic designer make one up to fit the exact measurements mentioned on this page for a professional look.

Connecting to Stripe
You will need to connect to Stripe to accept payments. Select the Connect with Stripe button. If you have a Stripe account already, simply enter the details and it will connect. If you don’t have one, proceed through Stripe’s setup pages after clicking the button. Stripe handles all payments, invoices and reporting so you can keep track of all purchases via their excellent reporting system.

NOTE: After connecting with Stripe for the first time you may be re-directed back to the My Account page. If this happens, simply head back to the Online Vouchers Setup screen as before to continue.
Passing the Processing Fees Onto the Client
Passing the processing transaction fees onto the client is standard practice and ensures you get access to this powerful tool at no cost. Simply tick this box, to enable this feature.

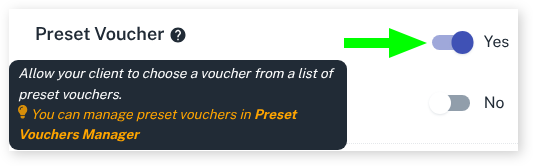
Preset Vouchers
If you want your customers to purchase from a list of preset vouchers, simply slide the Preset Voucher slider to Yes. Note that the preset vouchers are set up in another screen called the Preset Voucher Manager. A document on setting these up is here.
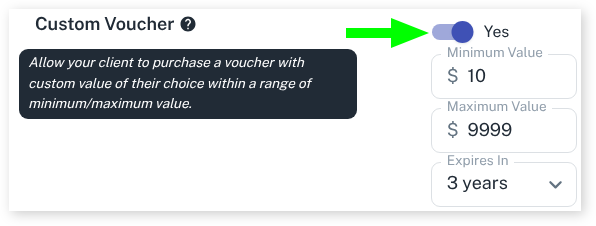
Custom Priced Vouchers
If you want to allow your customers to set their own purchase price, simply slide the Custom Voucher slider to Yes. This powerful tool allows you to have control over the minimum and maximum price a customer can spend. In the example below, I don’t want to allow vouchers to be purchased unless they’re for at least $10 and I don’t want a maximum price so I’ll put a very high value here.
After that’s done it’s all set up and ready to go. Simply press the Save button and your settings are saved and ready to go.
The next steps you might want to look at are: